AI Art is all the rage at the moment, you don’t want to miss out do you? Follow this guide to be the envy of all your friends. You’ll be generating some weird stuff in no time!
What is Stable Diffusion?
Developed in Python, Stable Diffusion is an open-source AI art generator released on August 22 2020 by Stability AI. Read more about what Stability.ai is doing at thier website.
System Requirements
- A GPU with at least 6 gigabytes (GB) of VRAM
- This includes most modern NVIDIA GPUs
- ~10GB of storage space on your drive
- Git version control software
- The Miniconda3 installer
- The Stable Diffusion files from GitHub
- The Latest Checkpoints (v1.4 is the current at the time of writing, 1.5 to be released soon)
- Windows 8, 10, or 11, Linux and macOS
Step 1 – Software installation
- Install Git version control software
- Install Miniconda3
- Download the Stable Diffusion GitHub repository and the Latest Checkpoint file.
The checkpoint files can be found here:
https://huggingface.co/CompVis/stable-diffusion-v-1-4-original
It’s quite a confusing page at the time of writing, so heres a helpful screen capture of where to get it on the page.
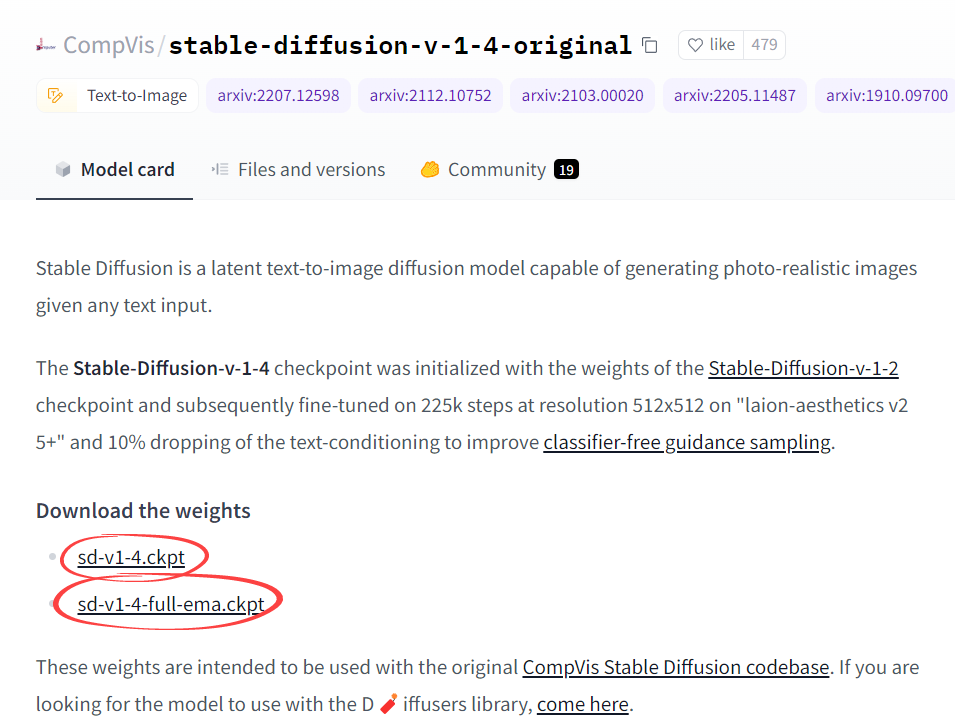

So grab the first one if you aren’t ready for the ‘full’ experience.
Step 2 – Folder configuration
With everything installed as per the previous section, we now need to set up a few folders on our local computer and unpack the files for Stable Diffusion.
Navigate to your “projects” folder (or similar) on your computer and make a folder called “stable-diffusion.” (eg: c:\projects\stable-diffusion)
In your file manager, open the “stable-diffusion-main.zip” file you downloaded earlier, copy the contents of this ZIP archive into the “stable-diffusion” folder you created earlier.
You should now have a file path similar to the following:
c:\projects\stable-diffusion\stable-diffusion-mainStep 3 – Environment configuration
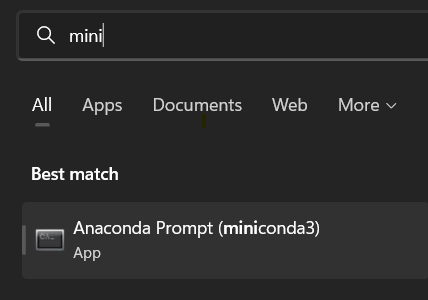
Select the Start menu and start typing “miniconda3” then select “Anaconda Prompt (miniconda3)”
With this command line terminal open, enter the following commands one at a time.
cd C:\projects\stable-diffusion\stable-diffusion-mainThis ensure that you have navigated to your stable-diffusion-main folder. (assumes you have C:\projects as your root path, change this if nessesary)
conda env create -f environment.yamlThis creates the nessesary development environment for you to run Stable Diffusion correctly, this may take a while (depending on your download speed) as some of the files are quite large, be patient.
If you weren’t patient or canceled or paused this process this for any reason, you will need to delete the environment folder, and run the conda env create -f environment.yaml command again. In that case, perform the previous command after deleting the “ldm” folder in “C:Users(Your User Account).condaenvs.”
This can also be an issue if you don’t have enough space on your hard drive (I learnt this the hard way) if so, just delete the failed attempt and start again.
conda activate ldmThis activates the conda ldm, you will need to do this everytime you want to use Stable Diffusion.
mkdir models\ldm\stable-diffusion-v1This creates a folder to store the checkpoint file you downloaded earlier.
Copy the checkpoint file (sd-v1-4.ckpt) into this new folder. Rename this file as model.ckpt.
Step 4 – Using Stable Diffusion
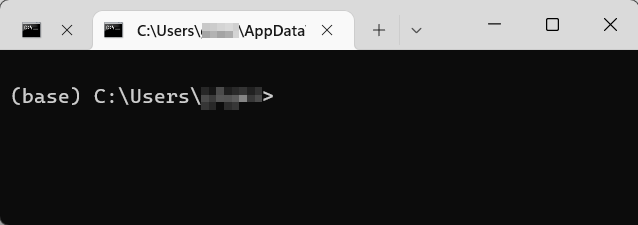
Open Anaconda Prompt (miniconda3), this will show you a Terminal window, something like the following.
Navigate to C:\projects\stable-diffusion\stable-diffusion-main
Enter the following command into this prompt
conda activate ldmThen enter the following into the prompt (replacing <YOURPROMPTHERE> with some unique text of your own)
python scripts/txt2img.py --prompt "<YOURPROMPTHERE>" --plms --ckpt sd-v1-4-full-ema.ckpt --skip_grid --n_samples 1
The console window should look similar to the following:

The console window will show a progress indicator as it creates the images, wait for this to complete, then checkout the results!
All images produced by txt2img.py can be found at:
C:\projects\stable-diffusion\stable-diffusion-main\outputs\txt2img-samples\samplesYou can even generate a new image from a prompt and an image with the following script.
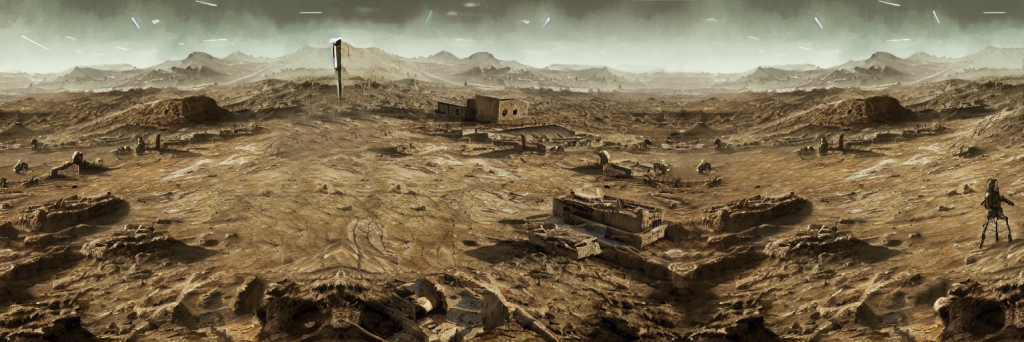
python scripts/img2img.py --prompt "<YOURPROMPTHERE>" --init-img "inputs/input.png" --strength 0.75 --ckpt sd-v1-4-full-ema.ckpt --skip_grid --n_samples 1Here’s a few samples I’ve generated with this setup, captions are the prompts I used.


This article referenced the following articles in the creation of these instructions.